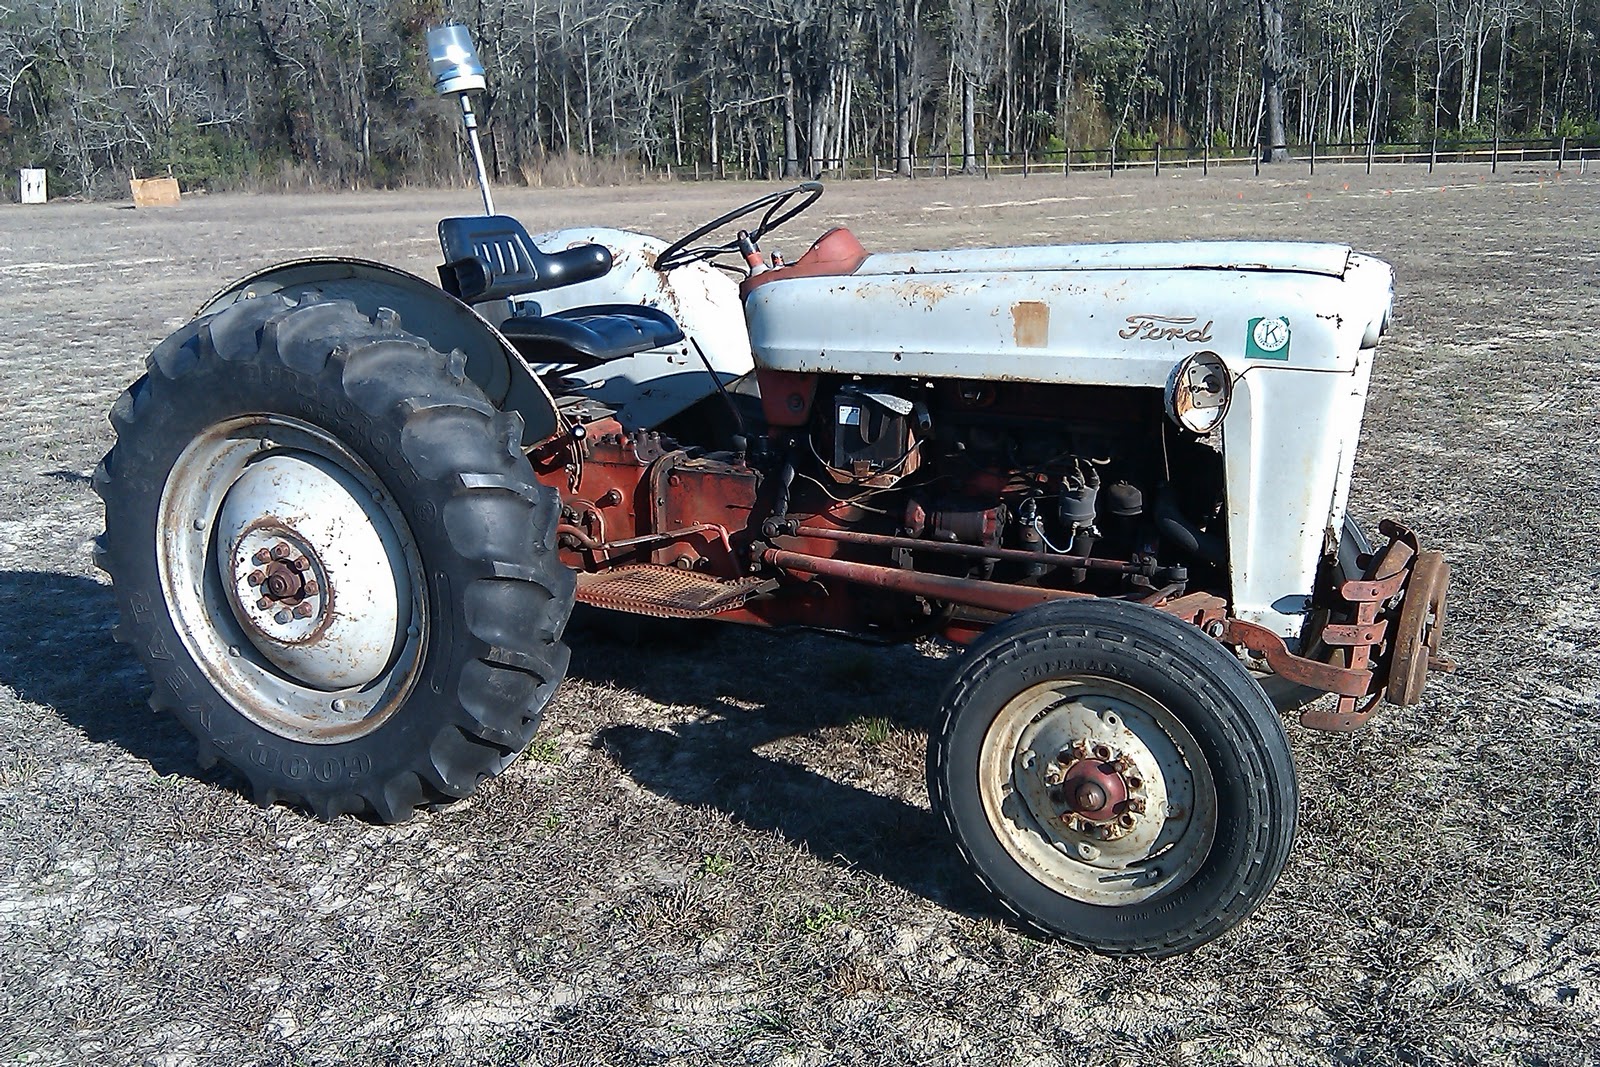
I love being able to work on projects with other people's money! The tractor to the left is a
Ford NAA that belongs to the Kiwanis Club of Statesboro. She has lived a good life at the local fairgrounds, but she's been just about used up. She lived outside in the elements for more than 10 years. The worst stress is that she is a "community tractor." That's my own fancy term for a tractor that is used by a variety of people who have a variety of experience on a piece this old. Luckily this is one of the most bulletproof tractors ever built, so she handled it gracefully.
After talking with club leadership, I decided to take on the project of sprucing her up a little bit. I am glad that they decided to keep this tractor as opposed to buying a new one because a big part of our Fair is agricultural heritage. This Ford is from a generation of tractors which completely revolutionized farming. I was given a budget of $1,000 for the project, but of course any amount under that would be better ;) I think we should be just fine with that number. So here I sit with a tractor to refurbish, $1,000 to do it, another opportunity to "Back 'er Down" with my Father and an opportunity for my boys to get a taste of this family tradition. God has blessed me in a mighty way! What a wonderful opportunity!
Despite the image presented by the 8 zip ties and 5 pieces of bailing wire that were holding various things together, she's pretty solid. A big money saver is that the tires are all good. The fronts are a pretty worn, but they are safe and hold air. The back tires are excellent. That is a good thing because that would have taken half of the budget right away. After taking the sheet metal off and performing a quick initial degreasing we began to look at what needed to be done. The list included:
oil change (simple, but sooooo important. It was BADLY needed too, lol)
secure gas tank (one bolt was holding the tank in place. There were supposed to be four!)
carburetor rebuild (carb looked good. Needed a rebuild in the worst way, but it was solid)
plugs and wires (no new crap....old school copper)
distributor cap, points, condenser, rotor (common maintenance on these old gals)
coil (has been converted from a 6 to 12 volt electrical system. This saved a lot of cash)
fan belt (the old one was fully extended and was rubbing the exhaust pipe!)
electrical system rewiring (was actually not too bad. Just needed to be a little safer)
new exhaust system (totally shot! tailpipe held on with bailing wire)
clean air inlet and replace hoses (at least 1 inch of goo in the bottom of the air cleaner)
sediment bowl screen and gasket (leaking gas, but that's pretty common on these old tractors)
This was the initial needs list and I am pleased to say that we are now done with that portion! We cranked it up Thursday night and she ran like a champ! I expected much more oil blow-by considering the wear and age, but it was actually not too bad. The tractor is very very mechanically sound. We ran into a little snag with the throttle linkage that we're working through. wouldn't be as much fun if we didn't have a challenge though ;)
Next up will be a more detailed cleaning and we will start to sand and prep for paint. We will also remount a strobe light (insurance requirement) and add a rear utility light. She had no grille at all, just an exposed radiator. We'll take care of that as well. There is a list of other various aesthetic odds and ends as well. Most of that will be done after painting.
I committed that I would work backwards on this project, spending the money to get it running good and safe first. Beauty would come with whatever money is left. As it sits the tractor runs great and we've spent $475. We should have no problem making budget. That's good because every penny we save is one more that can be used for the Fair, which in turn generates more money for needs in our community. I'll give another update when we get into paint and beautification.
I'm very excited about this project. This will be the first Ford that my Father and I have done. Over the years we have done many, many John Deeres and even and hand full of Farmalls. Working on this Ford is new and interesting and another opportunity to learn and experience something new. I'm all about that.
Y'all take it easy,
Alex

 The final installment of my three blogs documenting the process of refurbishing a Ford Jubilee for the Kiwanis Club of Statesboro. Part 1 gave a brief description of the cleanup and all of the wacky things that were wrong. Part 2 expanded on that and gave a little talk about the cleanup process and the mechanical repairs. We finally got to the point of painting. the first order of business was attempting to salvage the sheet metal. You can buy and entire hood and side legs for this tractor for about $1000. However, that was my total budget for this project. That meant getting out the grinder, hammer and giving it what I call "violent encouragement." There were areas that had been welded back together and other areas that had rotted away. It wasn't pretty and it didn't really fit back together properly. Dad and I aren't really very talented body work guys. We could have taken it to a body shop, but again......budget. We did a lot of banging and bending until we got it in place and somewhat straight. When we started the tractor did not have a grille. We found one, but the original mounting tabs had long rusted away. We needed something so I went digging. When we moved my youngest son to a bed, I disassembled his crib and kept some of the parts. (see my May 15 garden update for the potato drying rack that I made from the base) I dug through and found two brackets that worked perfectly! A shot-coat of ford medium grey paint and they were good to go! I would like to have done a $3000 restoration, but then folks would have felt guilty for using it. By putting $1000 into it it gets it looking decent, running great and ready to work. It's going to get dinged and scratched. It's going to have things break again. That's okay. That's what it's for. It's meant to work. so now the before and after pictures..........the old Ford came a LONG way!